Woodworker's Journal 2004 Summer, страница 31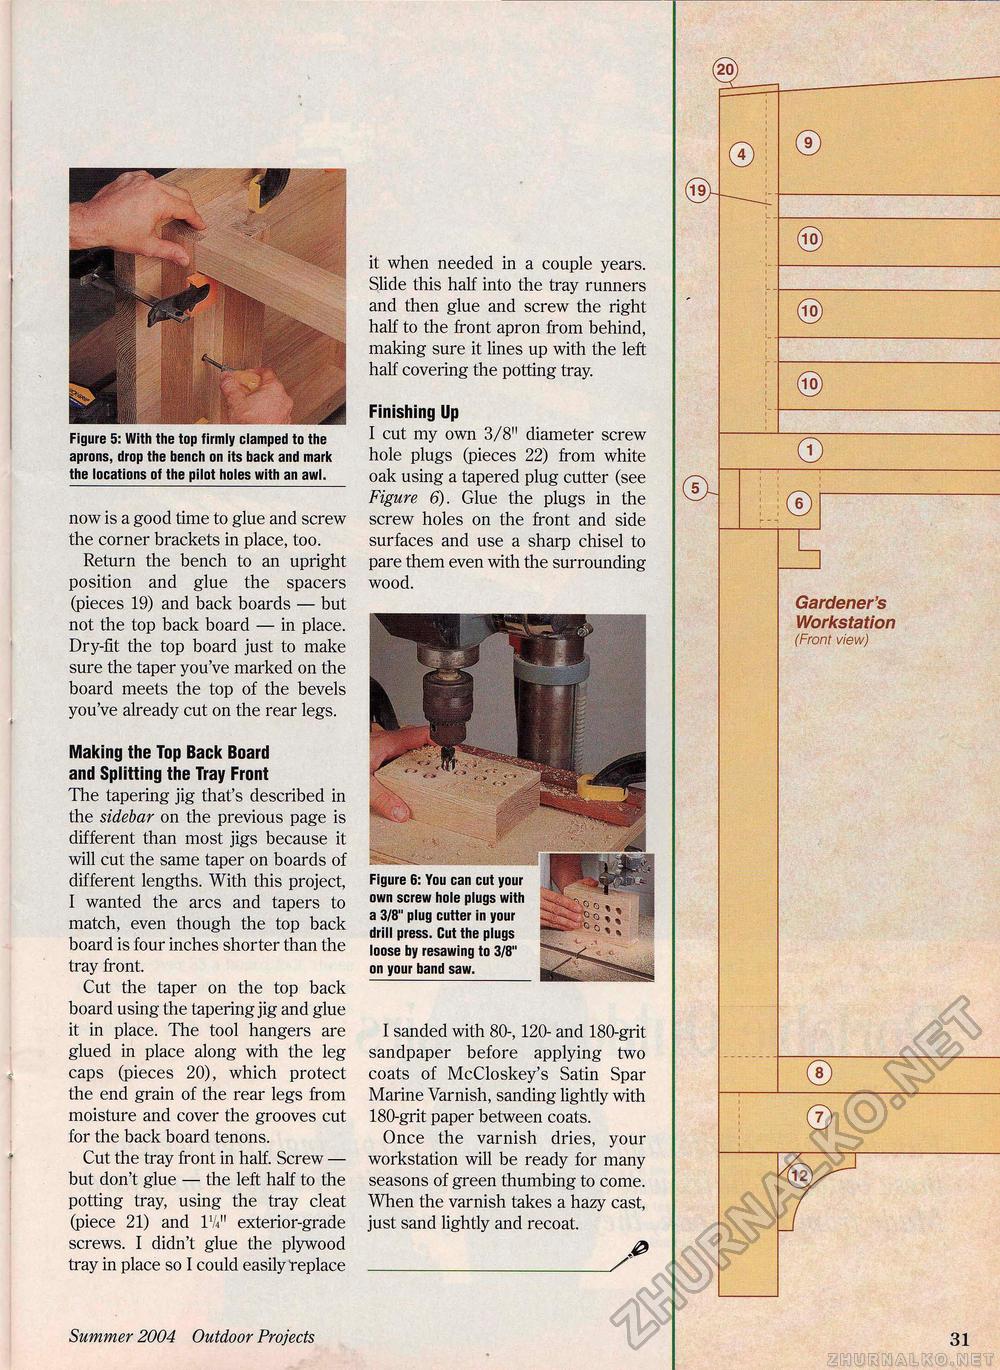
W'v f mt Figure 5: With the top firmly clamped to the aprons, drop the bench on its back and mark the locations of the pilot holes with an awl. now is a good time to glue and screw the corner brackets in place, too. Return the bench to an upright position and glue the spacers (pieces 19) and back boards — but not the top back board — in place. Dry-fit the top board just to make sure the taper you've marked on the board meets the top of the bevels you've already cut on the rear legs. Making the Top Back Board and Splitting the Tray Front The tapering jig that's described in the sidebar on the previous page is different than most jigs because it will cut the same taper on boards of different lengths. With this project, I wanted the arcs and tapers to match, even though the top back board is four inches shorter than the tray front. Cut the taper on the top back board using the tapering jig and glue it in place. The tool hangers are glued in place along with the leg caps (pieces 20), which protect the end grain of the rear legs from moisture and cover the grooves cut for the back board tenons. Cut the tray front in half. Screw — but don't glue — the left half to the potting tray, using the tray cleat (piece 21) and lW exterior-grade screws. I didn't glue the plywood tray in place so I could easily replace it when needed in a couple years. Slide this half into the tray runners and then glue and screw the right half to the front apron from behind, making sure it lines up with the left half covering the potting tray. Finishing Up I cut my own 3/8" diameter screw hole plugs (pieces 22) from white oak using a tapered plug cutter (see Figure 6). Glue the plugs in the screw holes on the front and side surfaces and use a sharp chisel to pare them even with the surrounding wood. I sanded with 80-, 120- and 180-grit sandpaper before applying two coats of McCloskey's Satin Spar Marine Varnish, sanding lightly with 180-grit paper between coats. Once the varnish dries, your workstation will be ready for many seasons of green thumbing to come. When the varnish takes a hazy cast, just sand lightly and recoat. Figure 6: You can cut your own screw hole plugs with a 3/8" plug cutter in your drill press. Cut the plugs loose by resawing to 3/8" on your band saw. Summer 2004 Outdoor Projects 31 |


